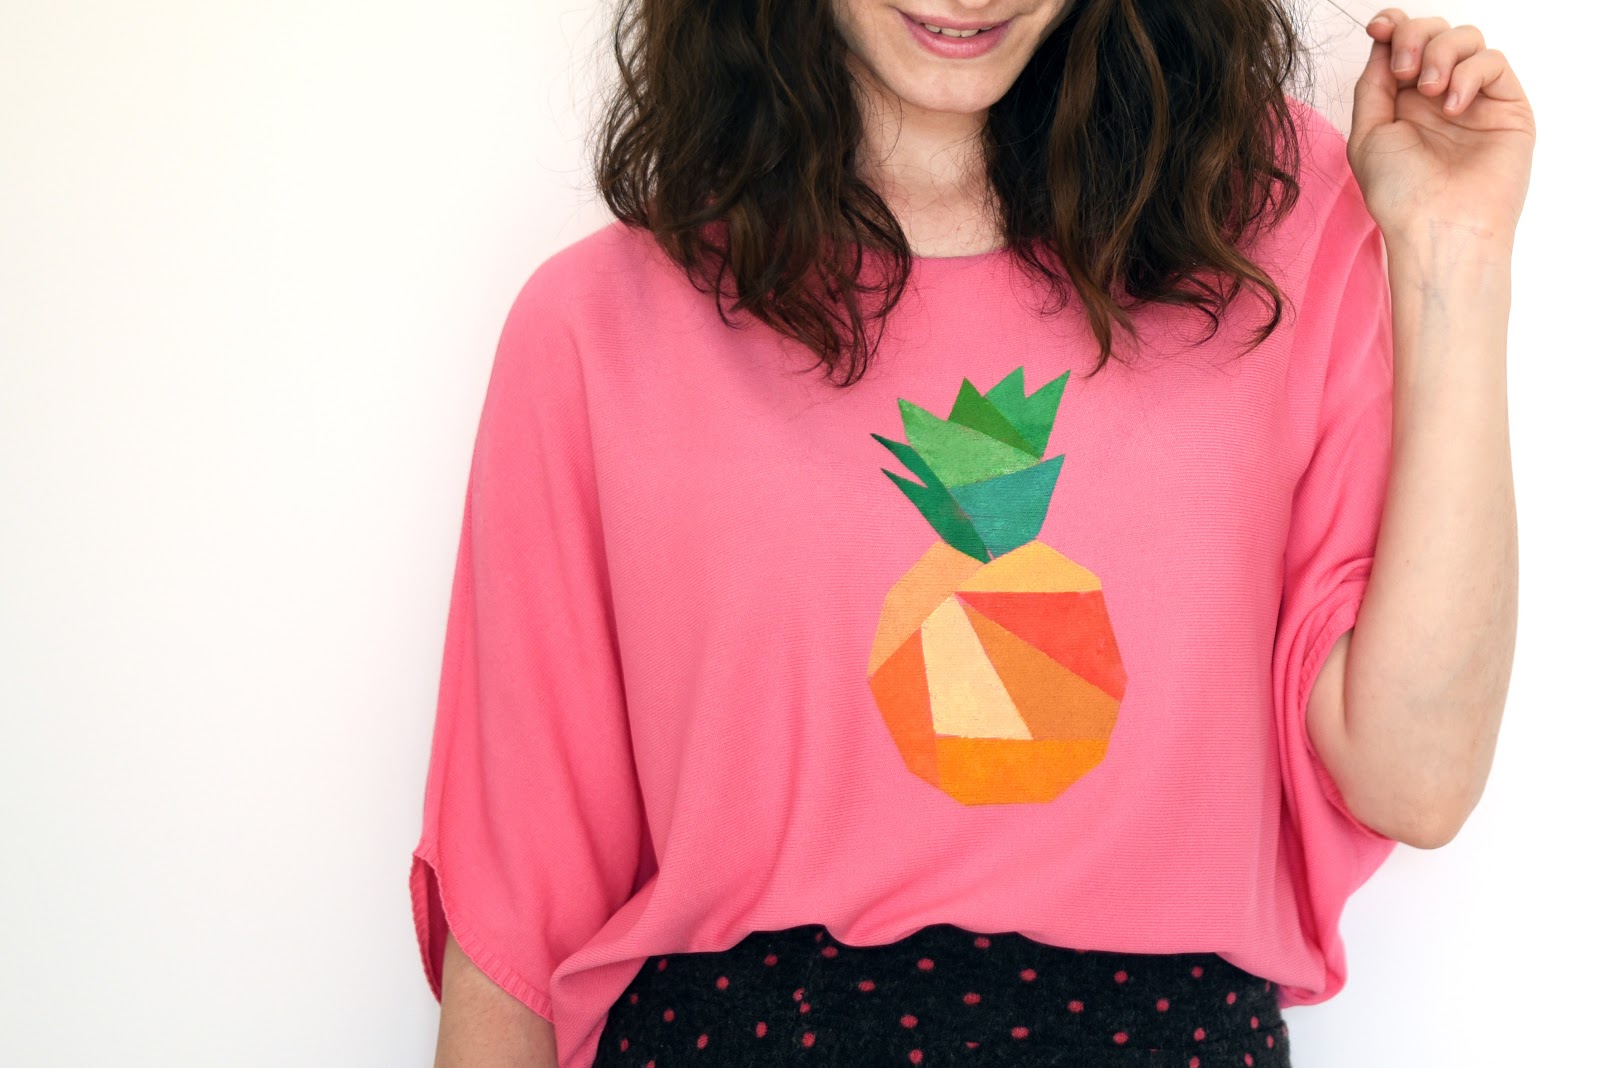
Hoy os traigo un DIY en colaboración con Escorpion, marca catalana que destaca por sus prendas de punto de muy buena calidad. He customizado uno de sus coloridos tops inspirándome en los diseños geométricos que imitan el arte del origami, en este caso, cogiendo la tropical y veraniega piña como motivo a estampar. Conocí de cerca Escorpion hace tres veranos en la 080 Barcelona Fashion, pudiendo disfrutar de su desfile y, más tarde, he ido asistiendo a otros de sus desfiles, enamorándome de la marca. En la próxima edición del evento de moda por excelencia en Barcelona volverán a desfilar para presentar su colección para el próximo verano. Seguro que volverán a sorprendernos, ya que la marca ha dado un giro en los últimos años, actualizándose y adaptándose a la mujer actual. ¿Os enseño el paso a paso del DIY? ¡Empezamos!
Today is the turn of a DIY in collaboration with Escorpion, a Catalan brand specialized in great quality knit garments. I've customized one of their colourful tops inspired by the geometrical origami designs, in this case, taking the tropical pineapple as pattern to print. I knew Escorpion closely some summers ago in a show in 080 Barcelona Fashion and have been able to enjoy more of their shows in other editions of the event. So, let's start with the step-by-step tutorial!

Materials: Top, card and cutter, masking tape, acrylic paint, sponge, blue acrylic paint.
Materiales: Top de Escorpion, cartulina y cutter, pintura acrílica, esponja, cinta de carrocero.
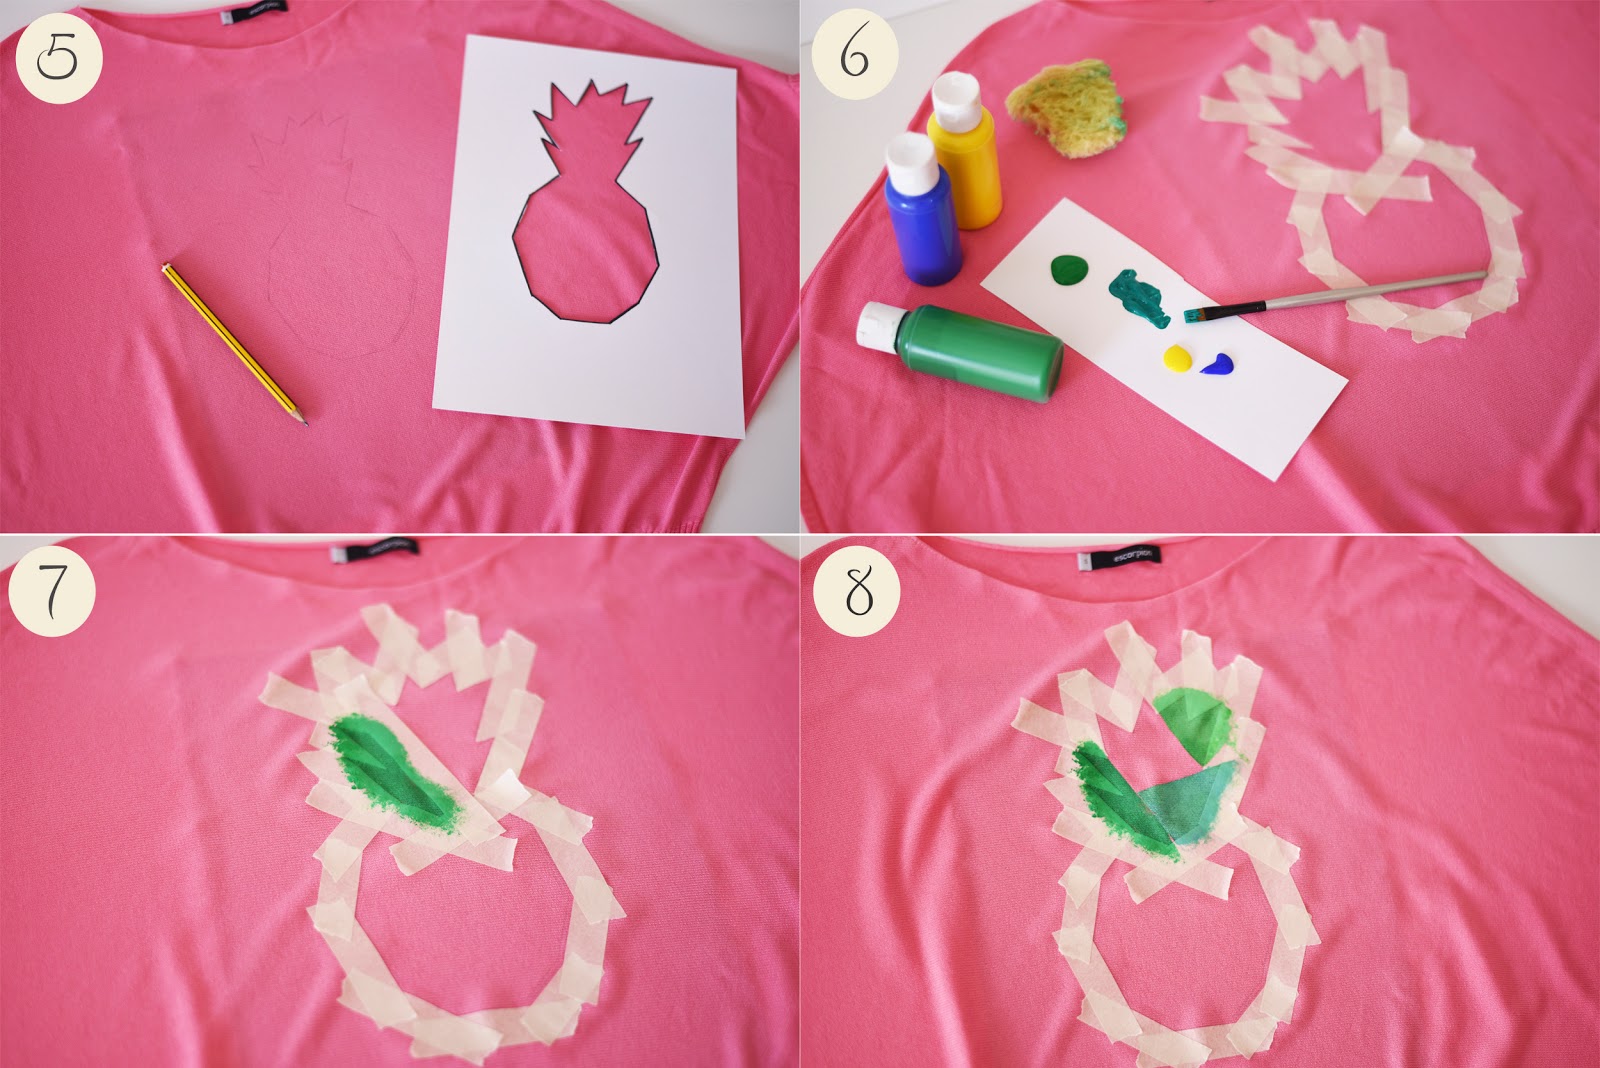
Draw the desired shape on a card; in this case an apple with straight comtours. Cut with scissors or cutter. Use the stencil to draw the shape with a pencil on the top, this way it will be easier to create the borders with masking tape of the pineapple that we are going to print.
Dibujamos la forma deseada en una cartulina o cartón fino; en este caso el contorno de una piña con los lados rectos. Recortamos con tijeras o cutter. Usamos la plantilla para dibujar sobre la prenda la silueta con un lápiz, así será más fácil orientarnos al ir añadiendo los trozos de cinta de carrocero que delimitarán el contorno.

Delineamos el contorno con cuidado con la cinta de carrocero. Este contorno se mantendrá durante todo el proceso. Sin embargo, poco a poco vamos añadiendo y quitando otro trozos de cinta para crear las formas internas de la piña. Empezamos por la parte de las hojas y usamos distintos tonos de verde para diferencias las diferentes formas geométricas. Usamos pintura acrílica, que colocamos en un plato o trozo de cartón, para ir empapando la esponja. Con suave golpecitos vamos rellenando las formas creadas por la cinta de carrocero. Al crear formas adyacentes, hemos de quitar y recolocar la cinta de carrocero que las separa para proteger y crear la frontera entre ellas. Así, poco a poco, vamos rellenando toda la piña. Quitamos la cinta de carrocero que quede y dejamos secar bien. Una vez seco, colocamos un trapo o pañanuelo de tela sobre la estampación y fijamos bien con el calor de la plancha.
Create all the contour of the fruit with the masking tape. It will stay during all the painting process. However, other pieces of masking tape will be added and removed to crate the internal shapes. Start at the part of the leaves and create different shapes using different tones of green with acrylic paint. Put the acrylic paint on a plastic dish or a piece of card and dampen the sponge on it. Press the sponge all over the shape to want to cover. Repeat the process until all the fruit is complete. tale out the masking tape and let it dry. Iron heat will fix the paint to the fabric.


Y ya tenéis vuestro top tropical con isnpiración origami. ¿Qué os parece? ¡A mí me encanta el resultado! Divertido, lleno de color y muy tropical.
And there you have your original printed top. Do you like it? Fun, colourful and very tropical.
Que mona!! me encanta la camiseta!
ReplyDeleteun besito guapa!
www.acurlystyle.blogspot.com
¡Te ha quedado chulísima!.
ReplyDeleteBesos.
Gemeladas
¡Que bonito te ha quedado!
ReplyDeleteMe gusta muchísimo :D
Besotes bonita.
Virginia
www.notstranger.com
Tienes manitos de angel, te ha quedado precioso!
ReplyDeleteBesitos,
pazhalabirodriguez.com ♡
wow thank you, must try.
ReplyDeletehttp://lensattire.blogspot.com/
wow, es muy muy chulo! me gusta ..
ReplyDeletehttp://www.letiziabarcelona.com
Me encanta! te quedo genial :* yo quiero una jajaja me gustan mucho las cosas diferentes :)
ReplyDeletewww.cocoabuttons.com